 Your Privacy Choices
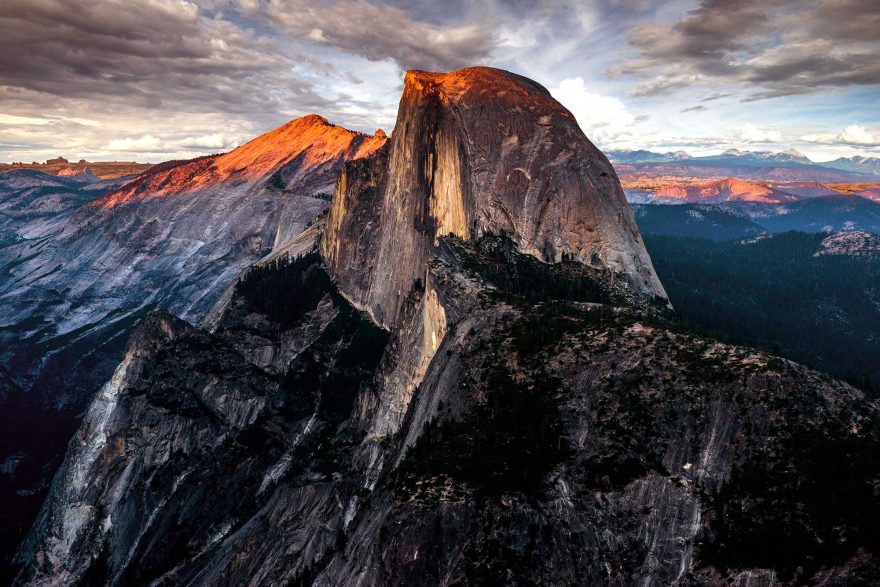
Half Dome is in Yosemite National Park, California (Image by Pung, Shutterstock)
Back in 2019, a group of friends and I decided that we wanted to do as many of the “permit-only” hikes in the U.S. as we possibly could. We did The Narrows in Zion, Haleakala at sunrise in Maui, and The Wave in Arizona — and Yosemite National Park’s Half Dome was up next.
Fast-forward a year and a half, and I was lucky enough to win a permit to hike the Half Dome Cables Route in September 2021. It didn’t sink in for any of us until after that point that this is one incredibly difficult hike. Iconic and bucket list-worthy, absolutely, but incredibly difficult nonetheless.
The Half Dome Cables Route is at least 14 miles roundtrip, with a 4,800-foot elevation gain. You also hike much of that at high altitude, above 7,000 feet. Although we’re a pretty adventurous and fitness-minded group, we weren’t sure that five months was nearly enough to prepare — physically or mentally.
View this post on Instagram
We researched the hike extensively, but ultimately, we were still quite surprised by many things about it. Here, I’m sharing all the nitty-gritty details of hiking the Half Dome Cables Route, including (and especially!) the not-so-glamorous aspects.
The Half Dome Cables Route
There are a lot of unique things about hiking the Half Dome Cables Route — it’s long, grueling, and iconic, for starters — but one in particular stands out. You need a Half Dome Cables Route permit for half the year, but technically, you can hike it any time (weather permitting).
To clarify, you can hike Half Dome whenever you want, but you need a permit from late May through early October — the dates the cables are technically “up.” But just because you can hike it without the cables, doesn’t mean you should. In fact, the National Park Service “strongly discourages hikers from attempting the cable route when the cables are down.”
Allow me to explain further …
The last 400-foot section of the Cables Route, where you summit Half Dome itself, is incredibly steep (as in, 45 degree-angle steep!) and completely exposed. Even under the most optimal conditions when the cables are in place, it’s dangerous.
View this post on Instagram
Just before Memorial Day, NPS installs metal supports along the steel cables that create a handrail system going up Half Dome. This system, along with wooden boards every 10 feet or so, allows people to reach the summit without any technical mountaineering gear.
The supports come down every October, leaving the cables just lying on the granite. Again, you technically can still reach the summit, but it isn’t recommended. If you are going to attempt it, you should have rock climbing experience and bring climbing gear with you: a harness, at least two prusik loops, two locking carabiners, and a good pair of gloves, to name a few things.
Getting a Half Dome Cables Route permit
If you want to play it safe(-ish) and get a permit for hiking the Half Dome Cables Route, there are several things you should know.
You need a permit every single day the cables are up. They are generally put in place the Friday before Memorial Day and taken down the second Tuesday in October. Note that extreme weather conditions may affect these dates.
The permit application is a lottery conducted every year in March via Recreation.gov.
View this post on Instagram
Each person may only apply once during the entire month, but you get to choose either specific dates or a date range — something unique to the Half Dome Cables Route permit process. Permit winners are notified in early April. Each permit allows for up to six people, and the permit holder will be required to show it along with a photo ID at the base of Subdome, prior to climbing the cables.
In “normal” years, 300 permits are awarded per day for the Half Dome Cables Route — 225 to day hikers and 75 to backpackers. In 2021, that number was reduced to 200. Your odds are slim, yes, but certainly not impossible. Choose weekdays if you can, as your odds increase dramatically.
Hiking the Half Dome Cables Route
Depending on where you start and the exact route(s) you take, the Half Dome Cables Route is somewhere between 15 and 18 miles long and ascends right around 5,000 feet. By any measure, it’s a strenuous day hike for even the most experienced hikers.
The Mist Trail and the John Muir Trail are two of the most popular routes, and it’s possible to take one on the ascent and the other on the way out. That’s exactly what we did, and I highly recommend it. The biggest reason? Coming down the super-steep steps of the Mist Trail after already hiking 14 or 15 miles is extremely hard on the knees and can be dangerous, particularly if the steps are wet.
View this post on Instagram
The routes eventually converge on the Half Dome Trail, but the beginning (or ending, depending on your route) of each trail is different. This breakdown focuses on the Mist Trail on the way up and the Muir Trail on the way out.
First Leg: Waterfalls Galore
Starting on the Mist Trail, the first section of your journey on the Half Dome Cables Route passes two impressive waterfalls, Vernal and Nevada. Don’t let the pretty scenery fool you — these first three or so miles are the most difficult. They’re relentless and practically vertical. It’s exactly 1.5 miles to the top of Vernal Falls and two more miles from there to Nevada Falls.
The trail on this segment is mostly made up of steep, seemingly endless stone stairs. If the falls are really roaring (late spring and early summer, typically), beware that the steps may be extremely slippery. In early September, the falls were barely trickling.
Note: There’s a bathroom and water fountain just across the Vernal footbridge, at the base of the falls. This is your last chance for the entire hike to refill water and use a “real” bathroom.
Second Leg: A Well-Deserved Break … Sort Of
At the top of Nevada Falls, the trail veers left toward Half Dome, going through Little Yosemite Valley. It (mercifully) levels out, but you often hike through sand, and much of the trail is exposed with no shade. Still, enjoy the break from aggressive stair climbing. Parts of this section pass by the Merced River, so feel free to take a dip before beginning to ascend again.
View this post on Instagram
Third Leg: Slow and Steady Climb
This leg of the trail can best be described as a slog. The 2.5 miles feel like five, because it’s very, very slow-going. Nothing about this section is particularly technical or difficult, but it’s a constant, unrelenting uphill climb.
The silver lining is that much of this section is forested, offering shade and plenty of inviting places to take a quick break. We were surprised by mid-90s temperatures in early September, so we took our time on this leg to pace ourselves and reserve energy for the subdome and cables.
Fourth Leg: Subdome
Many people don’t realize (we didn’t!) that Half Dome technically has two summits. Before ascending the “official” Half Dome, you have to first summit Subdome, a false summit by definition.
Subdome is just a half-mile long, but it’s … well, there’s no sense in mincing words, it’s hard. It’s just as difficult as the waterfalls section at the beginning of the hike, except far worse because A) you’re essentially stair-climbing up bare, exposed, very steep granite without any sort of handrails and B) you just hiked uphill at least 13 grueling miles — you’re exhausted, at best.
View this post on Instagram
Several people we encountered on the trail told us they thought Subdome was far more difficult than the Cables Route up Half Dome. Aside from all the things I just listed, there are also large sections where there are no steps whatsoever. Instead, you have to sort of monkey scramble over the smooth rock from one imaginary foothold to the next. It’s exhilarating, terrifying, and tiring all at once.
Important! You will be required to show your Half Dome Cables Route permit and picture ID before ascending Subdome. There’s a ranger stationed at the base seven days a week from sunup to sunset during “cables up” season, and you physically cannot pass without showing your credentials.
Fifth Leg: The Final Ascent Up Half Dome
Once you eventually conquer Subdome, you’re truly in the final stretch. The only obstacle left is climbing the Cables Route to the summit of Half Dome, 400 vertical feet up. Easy peasy.
Although nothing about this is actually easy — and it’s not quite as straightforward as it seems. People are simultaneously climbing up and down, so there are points where you’ll have to cling to the handrail and turn your body to let someone pass. Of course, not everyone hikes or climbs at the same speed or experience level, either. If you’re headed up behind someone much slower than you, it can be frustrating, but be patient and do not attempt to pass them. It’s not safe, it can completely throw off the mindset of the other people, and honestly, an extra five or 10 minutes is not going to hurt. Slow your pace and take in the incredible scenery.
View this post on Instagram
You’ll also find that some of the metal supports and wooden “steps” become loose, and sections of the granite become incredibly slippery over time. This can be unnerving, but it helps to remind yourself of the thousands and thousands of people who have successfully hiked the Half Dome Cables Route.
It’s also helpful to keep three points of contact at all times. This means keeping both hands on a cable and one foot planted as you take a step, or both feet planted while you switch hands on the cables. Keeping three points of secure contact is one of the best ways to keep yourself — and others — safe.
There’s one other factor to be concerned about when summiting Half Dome: the weather. At well above 8,000 feet of elevation, Half Dome experiences its own weather. It can be near freezing, windy, and storming at the summit, but sunny and calm less than a mile down. Because of all the metal on the cables and supports, Half Dome is also especially prone to lightning strikes. A sign at the base of the cables warns that lightning strikes the mountain consistently every month of the year. If there’s even the threat of a storm, be safe and wait it out or turn back rather than attempt it and get stuck on the cables.
The day we hiked Half Dome, our group of four was separated into pairs. Two people were able to summit successfully, but a storm rolling in prevented the other two from making it the entire way. It was dangerously windy, the storm was visibly rolling in, and we met several people who had either slipped on the cables or come very close to doing so. One man had a terrible “cable burn” on his arm from folding his arm over a cable to save himself!
We did try to wait it out awhile, but ultimately cracked our summit beers at the base of the cables when the four of us were reunited. To take on hikes and other adventures with this level of inherent danger, you have to know your limits and leave your ego back at camp. We were still incredibly proud of the accomplishment and felt those summit beers were well-earned.
Sixth Leg: The Descent
Now it’s time to hike the seven to nine miles back down — a task much easier said than done. Remember, you ascend nearly 5,000 feet to hike Half Dome. That means you’re climbing that again, but in reverse. It sounds like a welcome break, but you’ll soon be wishing for uphill. The steep downhill is difficult on your knees and ankles, and many sections are extremely slippery.
We took the John Muir Trail on the way out, and from our research, this is a popular choice. Although nearly as steep as the Mist Trail, you avoid hundreds of massive steps, which can be even harder on your fatigued joints and muscles. It does add a little over one mile to your distance, but from a safety and well-being standpoint, we decided it was worth it. We also saw two bears on the way out, which was a neat experience and solidified our decision!
View this post on Instagram
In total, it took us almost exactly 12 hours to hike the Half Dome Cables Route. All four of us are experienced hikers and athletic, but we did take our time. We took plenty of breaks on the way up, and celebrated with a refreshing dip in the Merced on the way down (highly recommend!).
If you absolutely had to, you could probably get it done in 10-ish hours, but why? Half Dome is, for most people, a once-in-a-lifetime experience. Stop as often as you want, smell the roses, and jump in the river.
Taryn Shorr is an avid outdoor enthusiast, frequent traveler, and wannabe photographer based in southern Arizona. She lives for the opportunity to explore The Great Outdoors, both at home and in new destinations, and firmly believes that nature is a form of both therapy and religion.