 Your Privacy Choices
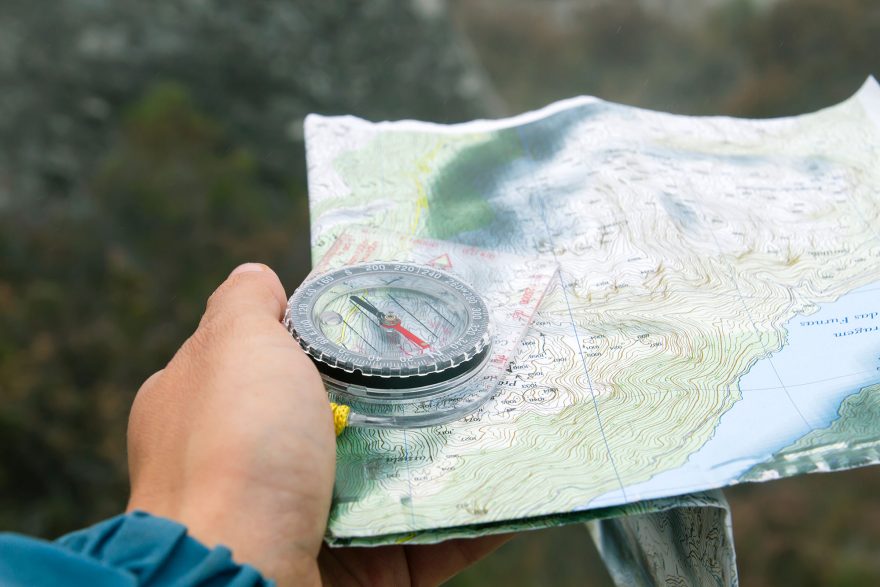
Any wilderness tool is only valuable if the user knows how to maintain it and wield it properly and effectively. For example, a knife is no good if the blade is dull, nor is a tent going to do much good if you don’t know which pole goes where. The same applies to a compass. Knowing how to use an orienteering compass in the backcountry amplifies the safety of any outing — and, very truly, could be the difference between life and death the deeper into the woods you go.
This series of articles is intended to explore the use of compasses more deeply and to help share the knowledge I’ve gained over the years as a tracker, search and rescue instructor and wilderness enthusiast. These several articles will cover the following discussions: (1) Compass Selection; (2) Using an Orienteering Compass; (3) Cell Compass Apps; (4) Declination; (5) Map Reading; and (6) Map and Compass.
Part 2: Using an Orienteering Compass
All of the directions below assume a common version of an orienteering style compass is being used. Other compass types exist, but may not follow these steps exactly to achieve the same result. The result of these techniques is a magnetic bearing, or a direction as an angle relative to magnetic north.

Magnetic Field Alignment
The magnetic needle on a compass responds to, and aligns itself with, the Earth’s magnetic field. It is important to know that this alignment is not only in the horizontal plane, but also in the vertical plane. It is therefore important to keep the compass level so that the needle or disc remains level and able to move freely in the housing. If the compass is tilted, the magnetic element may contact the housing and stop moving freely.
Another limitation of compasses is that some items aside from the Earth also have magnetic fields. These fields are small and weak but can interfere with a compass. Items with iron and other magnetic materials should be kept away from compasses. Examples of items with their own magnetic fields are vehicles, power lines, metal poles, knives, guns, anything with a battery (phone, watch, etc.) and, of course, other compasses.
It is a good idea to check and see if an item you may be carrying will affect your compass. This can be achieved by holding the compass level and still. Then bring the item slowly towards the compass to see if the compass needle moves. Start about 2 feet away then bring the item all the way to touch the compass. This will tell you two things. First, is the compass affected by the item at all? Secondly, how close does the item have to be to the compass to affect it? If the item (e.g. watch or cell phone) does affect the compass, then as long as you keep it farther away from the compass as you saw an effect, the compass should work fine.
There are two basic functions for which a compass is used. One is to take a bearing on a particular object, and the other is to follow a bearing. A bearing is an angle measured relative to a standard. Typically the standard, or starting point of bearings, is north or zero degrees. Other directions are measured as an angle relative to north. In the case of using a compass, angles are measured relative to zero degrees from 0 through 359 degrees.

Take a Bearing
If you see an object (e.g. cell phone tower or a plume of rising smoke), you can take a bearing from your position to that landmark. Do so by pointing the compass at the landmark. That is done by aiming the direction-of-travel arrow towards the landmark. Be sure to keep the compass level. The next step is to hold the compass still with one hand and turn the bezel with the other hand until the printed arrow (located at the bottom of the housing that turns with the bezel) lines up with the magnetic arrow. The printed arrow is incorporated on some compasses as two dots or bars that move as part of the bezel.
The last step is to read the bearing on the bezel. There is often a mark such as a white bar that doesn’t move with the bezel and is lined up with the direction of travel arrow. That mark is usually located near or under the bezel so you can read the bearing towards which the compass was pointed. When you read a bearing (remember most marks on compass bezels are in two-degree increments), that is the angle that was measured relative to magnetic north. That bearing is also called the magnetic bearing (or magnetic azimuth) for the object you sighted from your location.
Note: If you move from the original position, or deviate from an imaginary straight line between your original position and the landmark, you won’t be exactly on the original bearing any more. If you want to correct that, you’ll have to move back to that line, or determine the bearing anew.

Follow a Bearing
To follow a bearing, you basically proceed with steps that go in reverse for taking a bearing. Let’s use some hypothetical interest in traveling east (90 degrees) as an example.
The first step to follow a bearing is to rotate the bezel until it is set on the bearing you wish to follow. Remember that needs to be a magnetic bearing (accounting for declination or true bearings, which will be discussed in a future article). Turn the bezel of the compass until the small mark on the bezel is over the 90-degree slot. The printed arrow of the compass (that which moves when the bezel is turned), should now be resting 90 degrees away from the direction of travel arrow located on the base plate.
The second step is to rotate yourself (turn left or right) and the compass until the magnetic needle is resting in the printed arrow. The compass, via the direction of travel arrow, should now be pointing to the direction you entered. If you dialed in 90 degrees, you should now be facing magnetic east. The only way to verify that is to get another compass to see if it agrees with which way you think you are facing.
The third and last step is to move in the intended direction. The compass should be used occasionally to ensure that you are going in the correct direction. You don’t need to continue to point, stare and walk with the compass if you follow these steps. With the compass facing you intended direction, look out along the direction of travel arrow and find some landmark that stands out and you can walk towards (e.g. an odd-formed tree, a cell tower, etc.). If that landmark is closer to you than your objective, you’ll need to pick another landmark once you reach the first. Repeat this process until you reach your objective.
Summary
Compasses are fairly easy to use. There are many different kinds with a variety of functions and features on them. With a little bit of explanation and guidance, they can be a very useful tool for increasing your comfort level of navigating with or without the blue dot on a device screen. Stay tuned for the next article where phone compass apps are discussed. In the meantime, enjoy your surroundings.
Rob Speiden is a professional search and rescue volunteer who has participated in over 330 searches since 1993. He teaches land navigation, tracking and other SAR classes for both the Virginia Department of Emergency Management and his own Natural Awareness Tracking School. Rob has written two books on tracking humans for SAR: “Foundations for Awareness, Signcutting and Tracking” and “Tracker Training.” More information about Rob’s books and classes can be found at www.trackingschool.com.