 Your Privacy Choices
Follow these easy tips to enjoy a great cup of coffee while camping or hiking.
Christine and I were two days into a backpacking trip along a remote section of the Pacific Crest Trail. We had just crawled out of our tent into the early morning. Dawn was breaking to the east, but the stars overhead were still visible. We sat back-to-back on the rocky ground, bundled against the still winter cold on the edge of a steep ridge in the Tehachapi Mountains, high above the Mojave. The eastward view across the desert floor below us was stunning, a front-row seat to the brightening sky and rising sun.
It was many years ago, but I remember the occasion like it was yesterday. I also vividly recall that we watched the unfolding magnificence while each of us was holding a hot cup of coffee. The coffee! Something about it truly helped set the mood that morning. In my mind’s eye, I can even still see the mugs. In fact, I can recall dozens of similar outdoor scenarios playing out over the years where hot coffee was an integral part of the picture.
There aren’t many things better than greeting a cool, crisp morning with the steamy aroma of freshly brewed java. Or how about kicking back with a nice cup of joe after a long day on the trails? Don’t even get me started on just how essential the stuff is when the weather turns foul. Sure, it may make us jittery and ticks us off when we don’t get it, but that’s true of any addiction. And though it isn’t worth much in the way of sustenance, when it comes to mental health and mood-making, it’s a veritable super-food. Christine and I don’t hike or camp unless we’re carrying a Ziploc full of fresh-ground beans.
Without foraying too deeply into the realm of opinion, and thereby risking the wrath of everyone else, what follows is a review of the main methods of preparing coffee outdoors, when you are away from the kitchen or coffee shop. If the quality of your outdoor coffee experience has been underwhelming and one-dimensional, here’s hoping you’ll learn a few new rewarding tricks.
The quick stuff
There are several options on the market for preparing quick cups of coffee at home. These lend themselves equally as well to the camp or trail environment.
The instant option that’s been around the longest is freeze-dried from the jar. A spoonful of “crystals” added to a cup of hot water will give you something resembling coffee. Those lacking taste buds, a sense of smell, or refinement will find this option suitable. That isn’t necessarily bad, because this method is the easiest, and involves the least amount of waste and cleanup. I said I wouldn’t foray too deeply into opinion, and I already violated that promise, but I’m fairly confident that most coffee lovers are with me when it comes to freeze-dried.
Coffee bags, another option, are decreasing in popularity and aren’t as easy to find. Each serving comes in an individually sealed packet, resembling an oversized tea bag. Preparation is easy, the coffee bag is simply steeped in hot water for a few minutes. The taste is a step up from pure freeze-dried, but the price is the trash that results. For longer backpacking trips, the weight of the growing load of now-wet coffee bags can be substantial.
Starbucks introduced their Via line of instant coffee a few years ago to great fanfare. Since then, several knock-offs have been attempted by other companies. For the instant variety, this option is actually pretty good, not to mention convenient. But on a per-serving basis, it’s also the most expensive. If money is no object, and you want minimal fuss, give this option a try.
Filtering
Basket filters are designed for brewing individual servings of coffee directly in the mug. At home, ground coffee is packed for the camp or trail. Later, when it comes time to enjoy, a couple tablespoons of grounds are added to the filter basket, and boiling water is poured directly over the grounds into the mug. The coffee is then left to steep for several minutes. Provided the water is very hot, this creates a nice cup of coffee. It also allows you to use your favorite bean or roast. The downside is the need to dispose of the used grounds, either in a cat hole, or, if in a sensitive area, by packing them out.
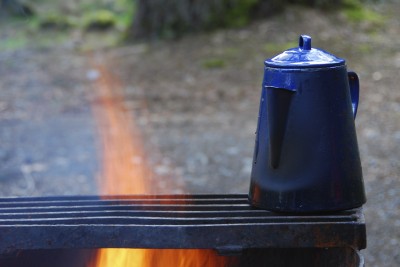
Percolating and boiling
Boiling and percolating are two blue-collar methods of coffee preparation that have long been used in the camp setting. Both methods are mechanically simple, but percolating requires a special, dedicated pot, definitely making it less than ideal for trail minimalists, where low volume and multi-function are key.
Most people are familiar with a percolator’s design, where grinds are loaded in a basket set on a stalk in a pot of cold water. The water is brought to a boil, some of which infuses the coffee grounds in the basket. A clean percolator can make a good cup of coffee, but the design works best when preparing more than one serving. Unless you are traveling with a group of coffee drinkers, percolators are not the best option if you tend to drink only a single cup at a time.
The boiling method produces what is often called “cowboy coffee,” requiring nothing but a regular cook pot to prepare. Because of that, it’s a good option for both trail and camp. The recipe is massively scalable with only coffee grounds as waste and, compared to the percolator, the pot is easy to clean afterwards.
Our base recipe for cowboy coffee is very simple and is can easily be tailored (and scaled) based on your preferences. Use about 1/3- to 1/2-cup of grounds poured directly into a pot of four cups cold water. Then bring the water to a boil. Once the wet floating mat of grounds completely breaks apart in the boiling water, remove the pot from the heat to permit the grounds to settle. A splash of cold water to the surface is useful in helping to sink any floating grounds. The hot coffee is then scooped from the surface, with care being taken to not kick up the grounds at the bottom of the pot (if you can’t tolerate the occasional bit of coffee grounds in your cup, you’ll want to try a different option).
Cowboy coffee has become our favorite java recipe when in a group setting. It’s easy to use our favorite beans and make a boatload of coffee at once. At the campground, we enjoy preparing cowboy coffee over a campfire, where the wood smoke truly enhances and mellows the flavor. Care needs to be taken when cleaning up, though. The waste is naturally organic, but, as with any of the preparation methods using ground coffee, the spent grinds need to be disposed of in a manner appropriate for your area, especially when backpacking.
Pressed
Pressed coffee is your gourmet option in the outdoors. For car camping, simply bring along the coffee press from home, if you have one. For backpacking, there are many purchasing options built specifically for this purpose. But if you multi-task your gear, you’ll find options for converting cook pots into presses, such as the systems sold by MSR. For the cost in weight of only a couple of ounces, you’ll be brewing some mighty fine coffee while camping or on the trail.
If you haven’t done it before, pressing coffee is easy, if not slightly more involved than other methods. First, the water is brought to a boil in the pot then removed from the stove. Next, the coffee grounds are added to the hot water to taste. The grounds are then stirred into the water, and the pot is set aside to allow to rest for the desired amount of steeping time, typically three to five minutes. Finally, the strainer disc is pressed downward into the pot, trapping the grounds underneath, ending the steeping process, and permitting the filtered coffee to flow up through the strainer. Your coffee is now ready to pour, free of any grounds.
You’ll probably need to use your press a few times to get the right combination of grind, brew time, and amount of coffee. But once you figure out your magic combo, breaking camp will never be the same.
Additions
Good coffee doesn’t need doctoring. In fact, that’s the last thing you’d normally want to do to a great cup of java. But we all want something a little different now and then, even with good beans, and truly bad coffee always needs help. In camp, the typical options and remedies are as close as your cooler or food bin. When backpacking, however, a little more thought should be given to the problem.
If you like sugar, it’s easy enough to carry a small amount in a Ziploc bag. Another option is sweet, flavored coffee syrup, which can be transferred to a small Nalgene bottle for the trail. A little syrup goes a long way toward making ghastly coffee tolerable. It will also turn a good coffee into a wonderful after-dinner treat. Light brown sugar can also be used to add interesting depth.
If creamer is your thing, the powdered kind can be carried in Ziplocs. Don’t waste your time with powdered non-fat milk, though, unless you simply want to turn your good coffee into a chalky white liquid. Instead, go for the good stuff by bringing along a rich, whole milk powder, such as Nido. To avoid clumping, add the powdered milk to your mug first, along with a small amount of hot coffee. Stir the mixture into a clump-free paste, then fill the remainder of your cup with hot coffee and stir.
Other options for bringing a little bling to your java are ground cinnamon, powdered nutmeg, and vanilla extract. All are easy to carry in spice containers or small Nalgene bottles.
So if your camp or trail experience has been suffering because of bad joe, don’t just write it off as a necessary sacrifice to being in the great outdoors. Give some of these options a try and before long, you too will find yourself greeting the morning with new appreciation.
Learn more about brewing up the perfect cuppa camp coffee by watching The Ultimate Guide to Camp Coffee video by Tim and Christine Conners on Camp Cooking TV:
Image copyright iStockPhoto/LoraClark