 Your Privacy Choices
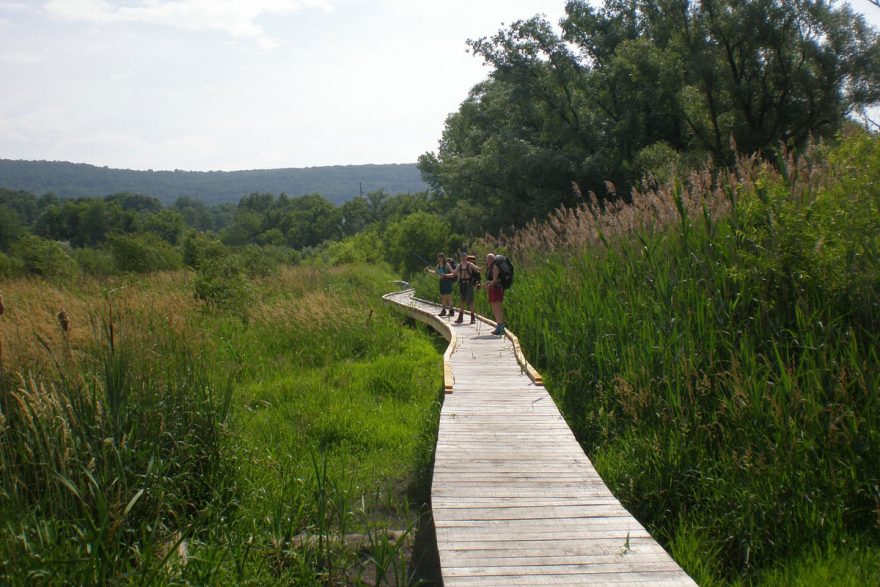
Congratulations, you’ve done it! After weeks, months or maybe even years of hemming and hawing, you’ve committed to adventuring on the journey of a lifetime and pursuing your dream of an Appalachian Trail thru-hike.
The initial whirlwind of emotions and excitement can quickly give way to waves of anxiety as you realize you’ll be living out of a backpack for months while traveling on foot between Georgia and Maine. This anxiety can raise some alarming questions: Where do I sleep? What do I pack? Where do I start? Don’t worry, we’ve got you covered.
Before tackling more than 2,000 miles of one of the best hiking trails on earth, make sure you read this guide.
What is the Appalachian Trail?
The Appalachian Trail, also known as the “AT” stretches more than 2,190 miles across 14 different states, six national parks, eight national forests and various local and state recreational areas and it’s often referred to as the best long-distance hiking route in the world. The trail will take you through lots of different environments, including mountain bogs, grassy balds, dense forests, lowland swamps, woodland slopes, alpine peaks and open farmland. To preserve the experience and keep it more primitive, the trail attempts to avoid more urban areas, and it only crosses a few small mountain towns.
Around 3 million people trek at least a portion of the trail a year, even though only a small handful of them walk its entire length. All thru-hikers that complete the trail gain a lot of knowledge, especially during the start of their journey, and many will tell you you can’t ever fully prepare for the challenge of hiking the whole of the AT; you just need to do it. Below are some pearls of wisdom that you can use to prepare for the experience ahead.
When to Start and Which Direction to Go
The first big decision you’ll need to make is when to start your thru-hike and which direction to take. We lump these two questions together as they are closely related, as the time of year you start your journey dictates whether you travel south to north or vice versa. Most thru-hikers begin at the southernmost trailhead on Springer Mountain in Georgia, as the northernmost section is considered to be the most arduous part of the entire hike.
Most AT thru-hikers spend anywhere between four to seven months hiking the whole trail, meaning that you will experience at least two seasons during your adventure. Therefore, most hikers start their journeys between March and December, so they thru-hike during the spring, summer, and autumn. It’s not impossible to thru-hike the AT during winter, even while experiencing deep snow, unpredictable storms, and low temperatures, but this will make your adventure more dangerous and certainly more challenging.
If you’re starting during late winter or early spring, we recommend starting in Georgia and therefore avoiding the heavy snows and cold weather at the north end of the trail. However, if you’re heading out during the summer, your best bet may be to start on Katahdin, where the weather conditions will be more forgiving than the summer heat down south. Commencing in the fall? You can begin your journey in Maine and quickly travel south, as it’s best to avoid the early onset of winter and head to the warmer sections before the snow sets in.
Most of the AT can be hiked year round, with the big exception being Baxter State Park (BSP) and Mount Katahdin, which close by October 15th, as they become too dangerous for hikers.
Camp or Shelter?
If you’re thinking of thru-hiking the AT, then you’re familiar with the idea that you’ll be sleeping in the woods, but you also have the option of using one of the established AT shelters.
Shelters
AT shelters are a bit different to what you may be used to, as they are usually three-sided wooden structures with an elevated wooden floor and an overhanging roof. They’ve been designed this way to help minimize the impact on wilderness areas and keep the trail as primitive as possible. Over 250 shelters are located throughout the trail, and most are located near water sources. The distance between them varies, but they are generally positioned between every 5 to 15 miles.
AT shelters were built and are maintained are preserved by local volunteer trail clubs. They all operate on a first-come-first-serve basis and can be used by all AT hikers, not just thru-hikers. Therefore, if you reach a shelter and it’s full, you’ll need to break out your tent or keep on hiking until you find a shelter that has room for you.
The amenities at each shelter will vary. Some will have fire pits, picnic tables, and bear-bagging systems, while others will be more basic. Some of the considerations you need to take into account if you’re thinking about using shelters during your thru-hike are the following:
- There is a social etiquette that needs to be followed.
- Most shelters are free, but others will ask for a small fee, especially if they are in highly frequented areas.
- As the shelters have outdoor “luxuries” such as a water source or a bathroom, they are popular with AT hikers and thru-hikers. Therefore, they are great places to socialize with other adventurers.
- Shelters can get very crowded, so if you’re not prepared to share your sleeping space with others, then steer clear.
- Don’t presume that you will always get to sleep in a shelter during your AT thru-hike. Unexpected circumstances may make the shelters unavailable or inaccessible, so packing a tent is essential.
Camping
You will need to rely on traditional camping if a shelter is already full or if you’d rather avoid the crowds. There are at least 100 designated camping sites along the AT, and they are usually near a water source, though that’s usually their only amenity.
There are some areas along the trail where you can choose your own campsite, commonly referred to as “dispersed camping.” While you can choose to camp wherever you want, there are some established dispersed camping sites that are regularly used by hikers. The regulations for dispersed camping vary depending on the park, state or town you’re at, so make sure to read up on any rules before setting camp for the night. In the Great Smoky National Park, dispersed camping is forbidden, and the same goes for New Jersey, New York, and New England.
To keep the AT as pristine and possible and preserve the ecosystem of the trail, we recommend avoiding clearing new areas by always trying to set up camp in established campsites, be they dispersed or designated.
What (and how) to Pack for an Appalachian Trail Thru-Hike
A question that may be weighing heavily on your mind is where to start packing for your adventure, and what you should pack.
Overpacking will mean carrying a heavy load, increasing your risk of injury, reducing your pace and increasing the likelihood that you’ll quit because of your constant physical discomfort. Underpacking means risking your life and increases your likelihood of quitting because you’re psychologically discomforted. Neither of these is a positive scenario, and they will mean that you’ve wasted time, effort and money and have nothing to show for it.
Your ideal pack, weight, and contents are up to you and is a very personal decision, but these are some of the things that you will most likely find on a thru-hiker’s pack.
The Essentials
- Backpack
Backpacks nowadays are lighter and more compact, ranging from 40L to 60L, depending on what you’re carrying and how much food you require. Most packs are simple, with no unnecessary added extras. You need to look for a pack that is lightweight and durable, but most importantly, it needs to fit right.
- Sleeping Bag
Most likely, you’re going to experience sub-freezing temperatures at one point or another during your thru-hike. Therefore, it’s important that you look for a sleeping bag in the 20-degree range. The big question is the insulation material: synthetic or down? Both have their advantages and disadvantages. Synthetic is cheaper and works better in damp environments, while down more compressible and lighter.
So how to choose? If your tent is waterproof, then go with down, and pick synthetic if you’re sleeping in a tarp tent.
- Sleeping Pad
Peak performance is closely related to having a good night’s sleep. A sleeping pad is vital for cushioning yourself against wooden shelter floors or uneven soil underneath your tent. Your sleeping pad should be lightweight, from a reputable brand and offer insulation.
- Clothes
Most likely, this is where you’ll end up overdoing it. You’ll encounter a broad range of conditions while thru-hiking the AT, and you’ll need appropriate clothing for all sections. However, no redundancies are required, and you really just need the basics http://appalachiantrials.com/appalachian-trail-thru-hiker-resources-2/appalachian-trail-thru-hiker-gear-list/. For example, you’ll need no more than two pairs of underwear (yes, really) and two pairs of socks.
Your clothes should never be made from cotton, as it absorbs moisture and doesn’t wick it away from your skin. Cotton retains more odor than synthetic fibers, isn’t a good insulator and therefore puts you at a higher risk of hypothermia and will make you very, very smelly.
-
- Footwear
Proper footwear is without a doubt, the most important item that you’ll need on the trail, but it’s one of the most difficult to get right. Too-tight boots will give you blisters and destroy your feet, while too-big footwear runs the risk of you getting a sprained ankle. Your best bet is to head down to a reputable outdoors shop and get an experts help in finding the right fit for you.
Some things to take into consideration are that while it’s stereotypical to think of hikers with thick boots, trail runners are becoming very popular as they cause fewer blisters, dry more quickly and are lighter, allowing you to cover more ground more quickly. You can choose to wear trail runners or boots exclusively, or a combination of both depending on the terrain as boots are better in rocky terrains and offer more ankle support.
Your footwear should be at least a half-size bigger than your regular shoes, as you need enough space for your toenail not to bump against your shoes while hiking downhill, lest you want to lose a few toenails along the way. Your feet will also swell, so going up a size is always a good idea.
- Water Purification
While you may have heard that there’s no need to treat water along the AT, we definitely recommend having something to treat your water, and not run the risk of contacting any bugs. Puking and thru-hiking is never a good mix.
- Water Bottle/Hydration Reservoir
Keeping hydrated during the trial is a must. A reusable water bottle or hydration reservoir is a must to stay hydrated, and you can fill it up as you go.
- Stuff Sacks
You’ll need at least two waterproof stuff sacks, one for your clothes and another one for your sleeping bag and perhaps even a third for your food. We can’t recommend this enough, as you need to keep your camp clothes and sleeping bag dry at all times.
- Guidebook
Before you start planning your thru-hike, get an Appalachian Trail guide book. It’s vital for campsite and shelter information, learning about amenities available in nearby towns and planning your resupplying options. You might think it’s necessary to also carry a map as they’re your best bet against getting lost and give you a great deal of information about your surroundings, but the AT is clearly marked, so there’s no need for anything extra.
- First Aid/Hygiene
Overpacking is also a concern when it comes to first aid and health. Your first aid kit should be simple, and only include essentials when it comes to hygiene products.
You should include antibiotic cream, gauze pads, ibuprofen, antiseptic wipes, hand sanitizer, sunscreen, toilet paper, multi purpose soap and a travel-size toothbrush and toothpaste.
The Almost-But-Not-Quite-Essentials
- Hiking Poles
Hiking poles are not really essential, but we highly recommend them. They’re helpful for absorbing the impact of downhill hikes and give your knees some relief; they can also help out balance the muscle definition and possible disparity between your legs and your arms.
- Multi-tool/Knife
You might think that you’ll need a huge knife or multi-purpose tool, but save yourself the weight and just pack a high-quality pocket knife. Most likely you’re only going to end up needing it to cut your dinner.
- Cookware/Stove
Not all thru-hikers cook with the use of a stove, and when you’re carrying all of your stuff around for months at a time, a warm meal at the end of your day could feel more luxurious than necessary. However, you might want to think about carrying a stove, as ending your day with a cold bowl of oatmeal can make you feel as if you’re being punished.
- Headlamp
You’ll most likely be hiking during nighttime or darkness at some point, and it can be very awkward to walk while holding a flashlight. The ideal headlamp should have at least 70 lumens and be lightweight.
- Electronics and luxury items
Your smartphone is definitely one of the most versatile pieces of gear you can have on your thru-hike. Apart from acting as a phone, it also doubles as a music player, flashlight, note taker, camera, and computer. You may think that thru-hiking the AT is your chance to disconnect from the world, but keeping in touch with friends and family is always a good idea. Other luxury items which are common with thru-hikers are e-readers, pillows or a mascot.
Test Your Gear Before Heading Out
The place to test your new gear for the first time is certainly not the Appalachian Trail. Before setting out on your adventure, make sure you try out all your equipment, hopefully by taking a weekend backpacking excursion at one of your local trails. That way, you can be sure that everything fits correctly and works the way it’s meant to, especially your footwear, rain gear, tent and sleeping bag which are the vital items for keeping you comfortable in the long term. Make sure to thoroughly break in your boots before heading out, as blisters can, and will, ruin a thru-hike in a matter of hours.
Before Hitting the Trail, Get In Shape
Thru-hiking the Appalachian Trail is nothing if exhausting, mostly during those early days. At the end of each day, all you’re going to want to do is curl up inside your sleeping bag and pass out. Over the course of a few weeks, your body will start getting used to the physical demands, and the long hikes won’t be as fatiguing.
Save your body some stress and suffering by getting in shape before the start of your journey. Head out for day or weekend hikes on local trails on the weeks leading up to your departure, and carry a full pack. You can also do some cycling or running, as they will help build your muscles and cardiovascular strength. The more in shape you are, the better equipped you’ll be to handle whatever the trail throws at you.
There Will Be More Cars and Civilization Than Expected
The AT goes through some of the most remote areas of the United States, but it also crosses a lot more roads than you may think. You’ll be surprised to find yourself unexpectedly and suddenly standing alongside a busy road or highway waiting for a quiet moment where you can bolt across. You’ll encounter more cars than you’d expect, but while it can be disrupting to your illusion of a thru-hike in the middle of nowhere, those roads will be a source of happiness when you discover that they lead to nearby towns. When you reach those towns, that will be your chance to stock up on supplies to treat yourself to a warm bath or meal (or two).
Prepare to Up and Down (and Up and Down, and Up and Down, etc.)
Clingman’s Dome in the Great Smoky Mountains in Tennessee is the highest point along the AT. To reach it, you’ll hike to an altitude of 6,625 feet. It may not seem like a high altitude when you think that a lot of the western peaks are around 14,000 feet high, but since the AT goes along the spine of the Appalachian Mountains, you’ll encounter a lot of elevation gains and losses.
If you thru-hike the entire route, you’ll end up climbing around 515,000 feet, which roughly equates to climbing Mount Everest over seventeen times. You shouldn’t expect to be hiking in a lot of flat terrains, so during your preparations, make sure that the trails you pick offer high elevations and descents.
Beware of Bears
It’s not unusual to spot a lot of wildlife along the trail, and you’ll more than likely come into contact with raccoons, snakes, deer, squirrels, and birds. Most of these animals pose no threats, and they will scurry before a close encounter, but you do need to be aware and cautious around bears.
Black bears are not aggressive and tend to stay away from humans, but they won’t delay heading into the shelter or campsite during the night in search of food. In order to avoid having your food supply cleaned out by a hungry bear, store all food securely by using a bear canister and hanging it from a tall branch before heading to bed.
Focus on Your Goals
The AT thru-hike is a daunting task, one that will take months to complete in all sorts of terrain and weather conditions. You’ll endure blisters, bugs, poison ivy and countless other uncomfortable obstacles. Therefore, we advise you not to think about it as a trip to your end destination, as that goal may seem unreachable. Instead, think of it as short-term journeys, to the next state, the next town or a point of interest. If you can, reward yourself with small treats once you complete a goal.
Without a doubt, pulling off an Appalachian Trail thru-hike is hardest thing you’ll ever do, but it certainly is the adventure of a lifetime.
